
Knowing that there is still a jam making season (now passed), and participating in it, is a great part living in Napier – indeed it this is a real Hawke’s Bay tradition that has lingered long after the invasion of supermarket jams – because fresh fruit is so very plentiful here through late summer.
The older generation is full of stories of the 1931 earthquake that came mid-jam making season. The result was pantries stuffed to the rafters with jams and preserves that were then scattered far and wide in a big sticky mess. A story of also heard from Christchurch
One of the nice connection between then and now is the availability of proper Agee jam jars – either in their 1930s form with an extended neck – in their 1950s version in which the neck is really just a rim on the top of the body of the jar.

The two ages of Agee jam jars
Those unfamiliar with jam making in the traditional way are often perplexed by the lack on lids for these jars. However this is intentional. Just grab the jars if you see them – they turn up in the Sallies all the time. The ‘lids’ in the form of plastic seals come from the supermarket and are bought new each year.

Waugh Jam Jar Covers – at all good supermarkets
Another nice thing about these jars is that they can linger in the shed for years and with a quick trip through the dishwasher still scrub up nicely. Their transparent plastic seals means that the whole product comes up looking very glossy.
If you’ve never made jam before start with either apricot or plum jam – I’ve never progressed beyond them because they set so reliably. However a couple of dozen jars of each sees us through a couple of years – and fancy difficult jams can be acquired from the specialists jam makers with which the farmers market is full.
This is the Edmonds recipe for Apricot Jam:
6 lbs Apricots
6 lbs Sugar
1 Breakfast cup of Water
1 Vanilla pod
Split and stone the apricots; put into a preserving pan with the vanilla pod and water. Cook slowly until the fruit is pulped. Add sugar and boil rapidly for 15 to 20 mins. Test.
If you whack the stones with a hammer you can take out the kernels (the white bit) these can go in the individual jars and they add to the taste as the jam matures.
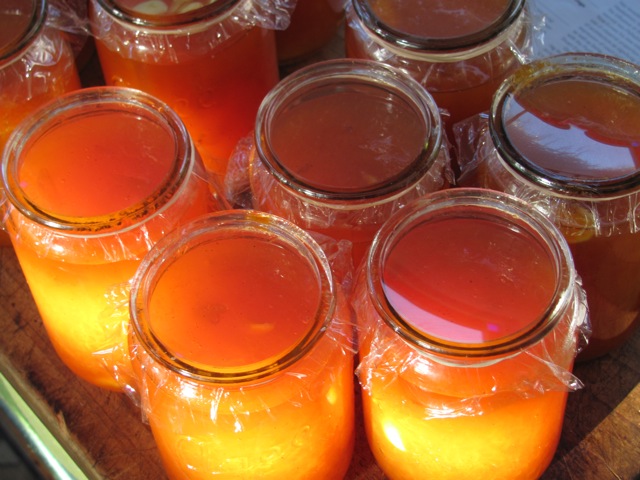
Pour the hot jam into sterilized jars (they need to be warm and straight from the dishwasher works). You place one of the cellophane tops on and the heat sucks them down – the top should bow inwards to wards the jam – then place band or string around the jar to seal the connection.

the NZ classic – 1950s versions are the best
This is the recipe for Plum Jam:
6lbs Plums (use Black Doris for the best jam)
4 1/ lbs Sugar
1 Breakfast cup of water
Split the plums; put into a preserving pan with the water. Cook slowly until the fruit is pulped. Add sugar and boil rapidly for 15 minutes. Test. The stones can be picked out, as they will rise to the surface.
Test: means place a little jam in a saucer and then wipe your finger through the middle – if like the red sea it remains separated than your jam will set in the jar.
The jars need to be hot and should not be overfilled. The instructions on for the labels are on the packet – but it is the gap between the jam and the top of the jar that makes it all work.
The point of this is to make a jam that tastes good but looks good too – these look great on the shelf and even greater on hot buttered toast.
DLJ
